Google API Access
Why we need this key
This service key connects the wappier platform to the Google Play API. As a result, we are able to perform the following operations:
- wappier is able to change prices of the in-app products in your Google Developer Console.
- wappier is able to create/delete in-app products in your Google Developer Console.
- wappier is able to capture any price changes and in-app products addition/removal. We have developed alerting/monitoring systems for this type of changes, by fetching all products in the Google Developer Console every day.
- wappier is able to validate with Google all tracked in-app purchases from the wappier Optimization SDK (only for the programs with SDK integration).
- wappier is able to fetch financial reports programmatically.
How to export this key
Follow the steps below, to provide wappier with your Google Service Key.
1. Console Login
Head to the Google Play Console and log in.
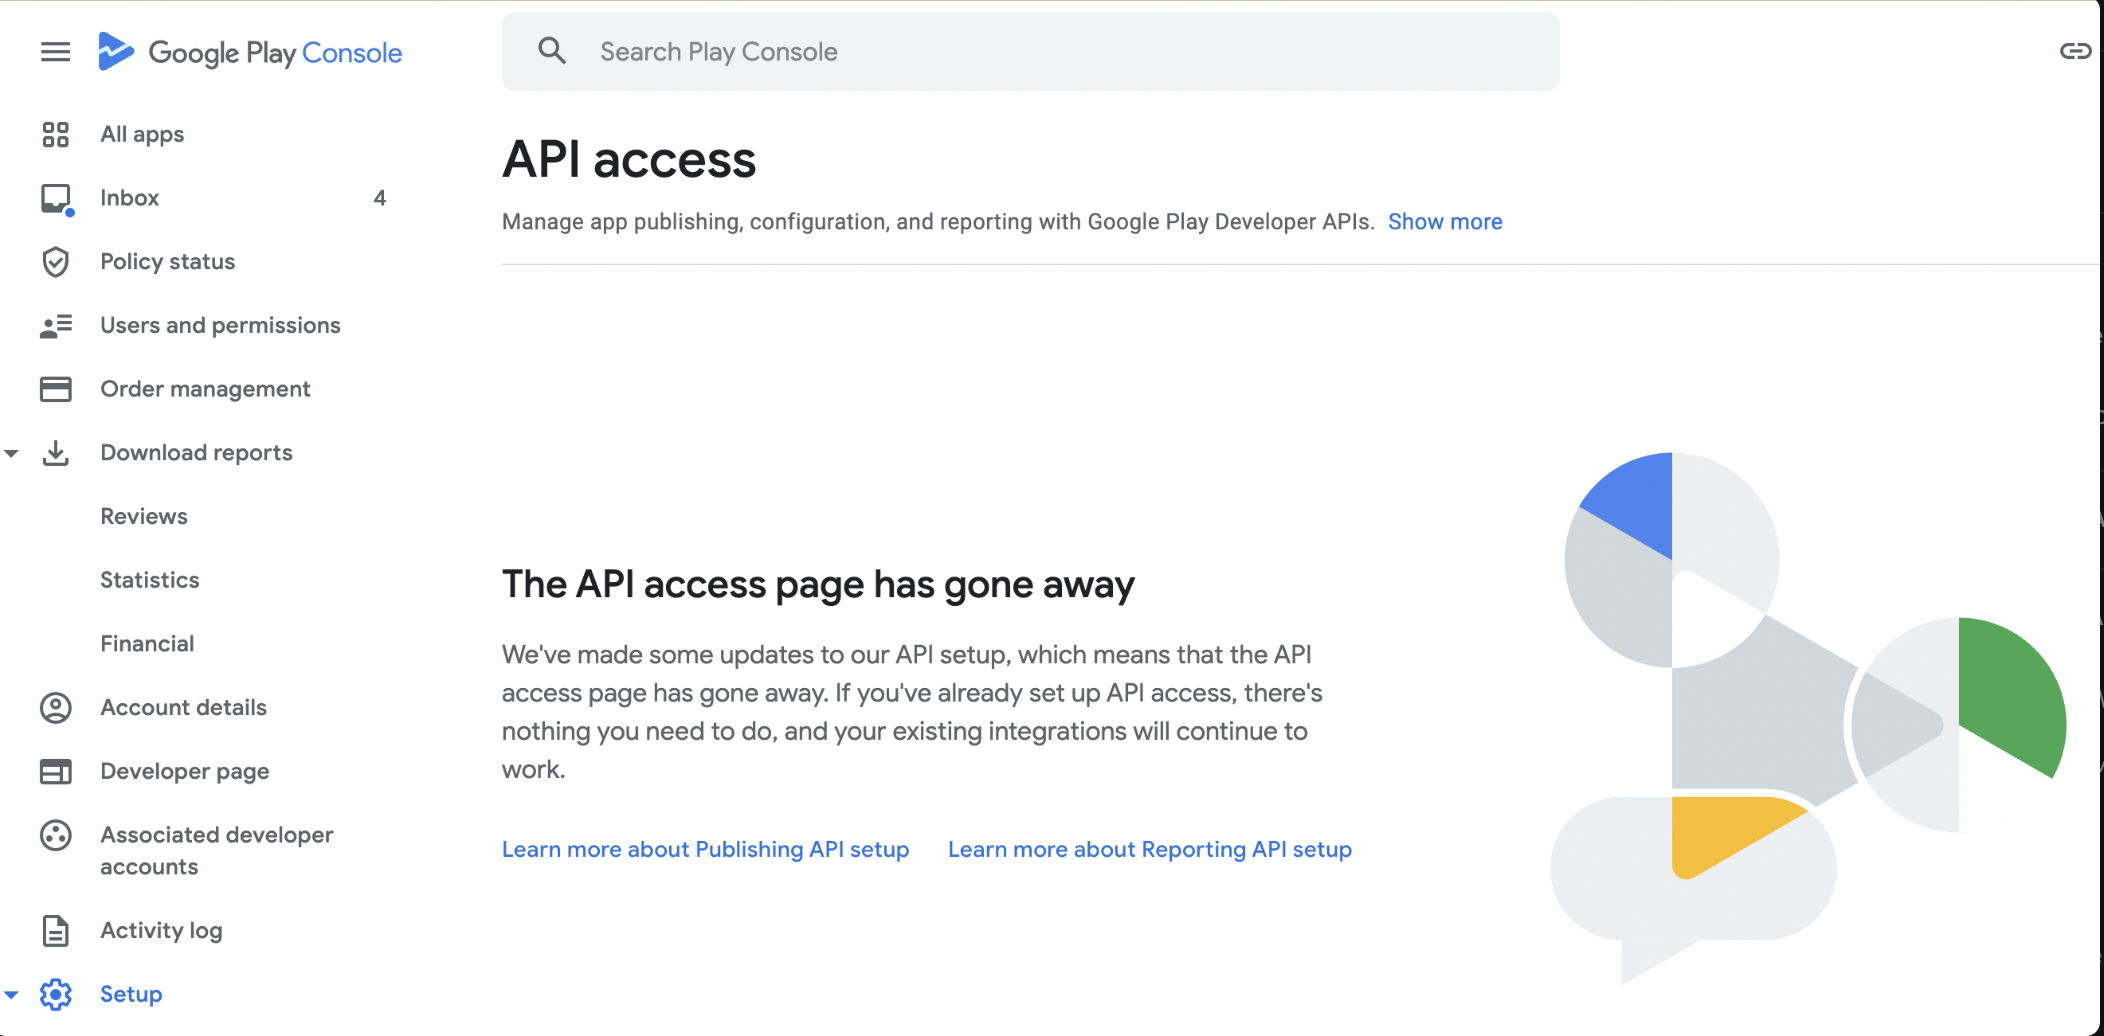
2. Api access
Select "Setup" in the left side and then click on the API Access.
Please note: If you do not see the relevant API Access sections in your Google Play Developer account, then please skip to step 2c below.
2a. API Setup (1)
Click on: Learn more about Publishing API setup
2b. API Setup (2)
Select Google Play Developer API page and agree/confirm the required.
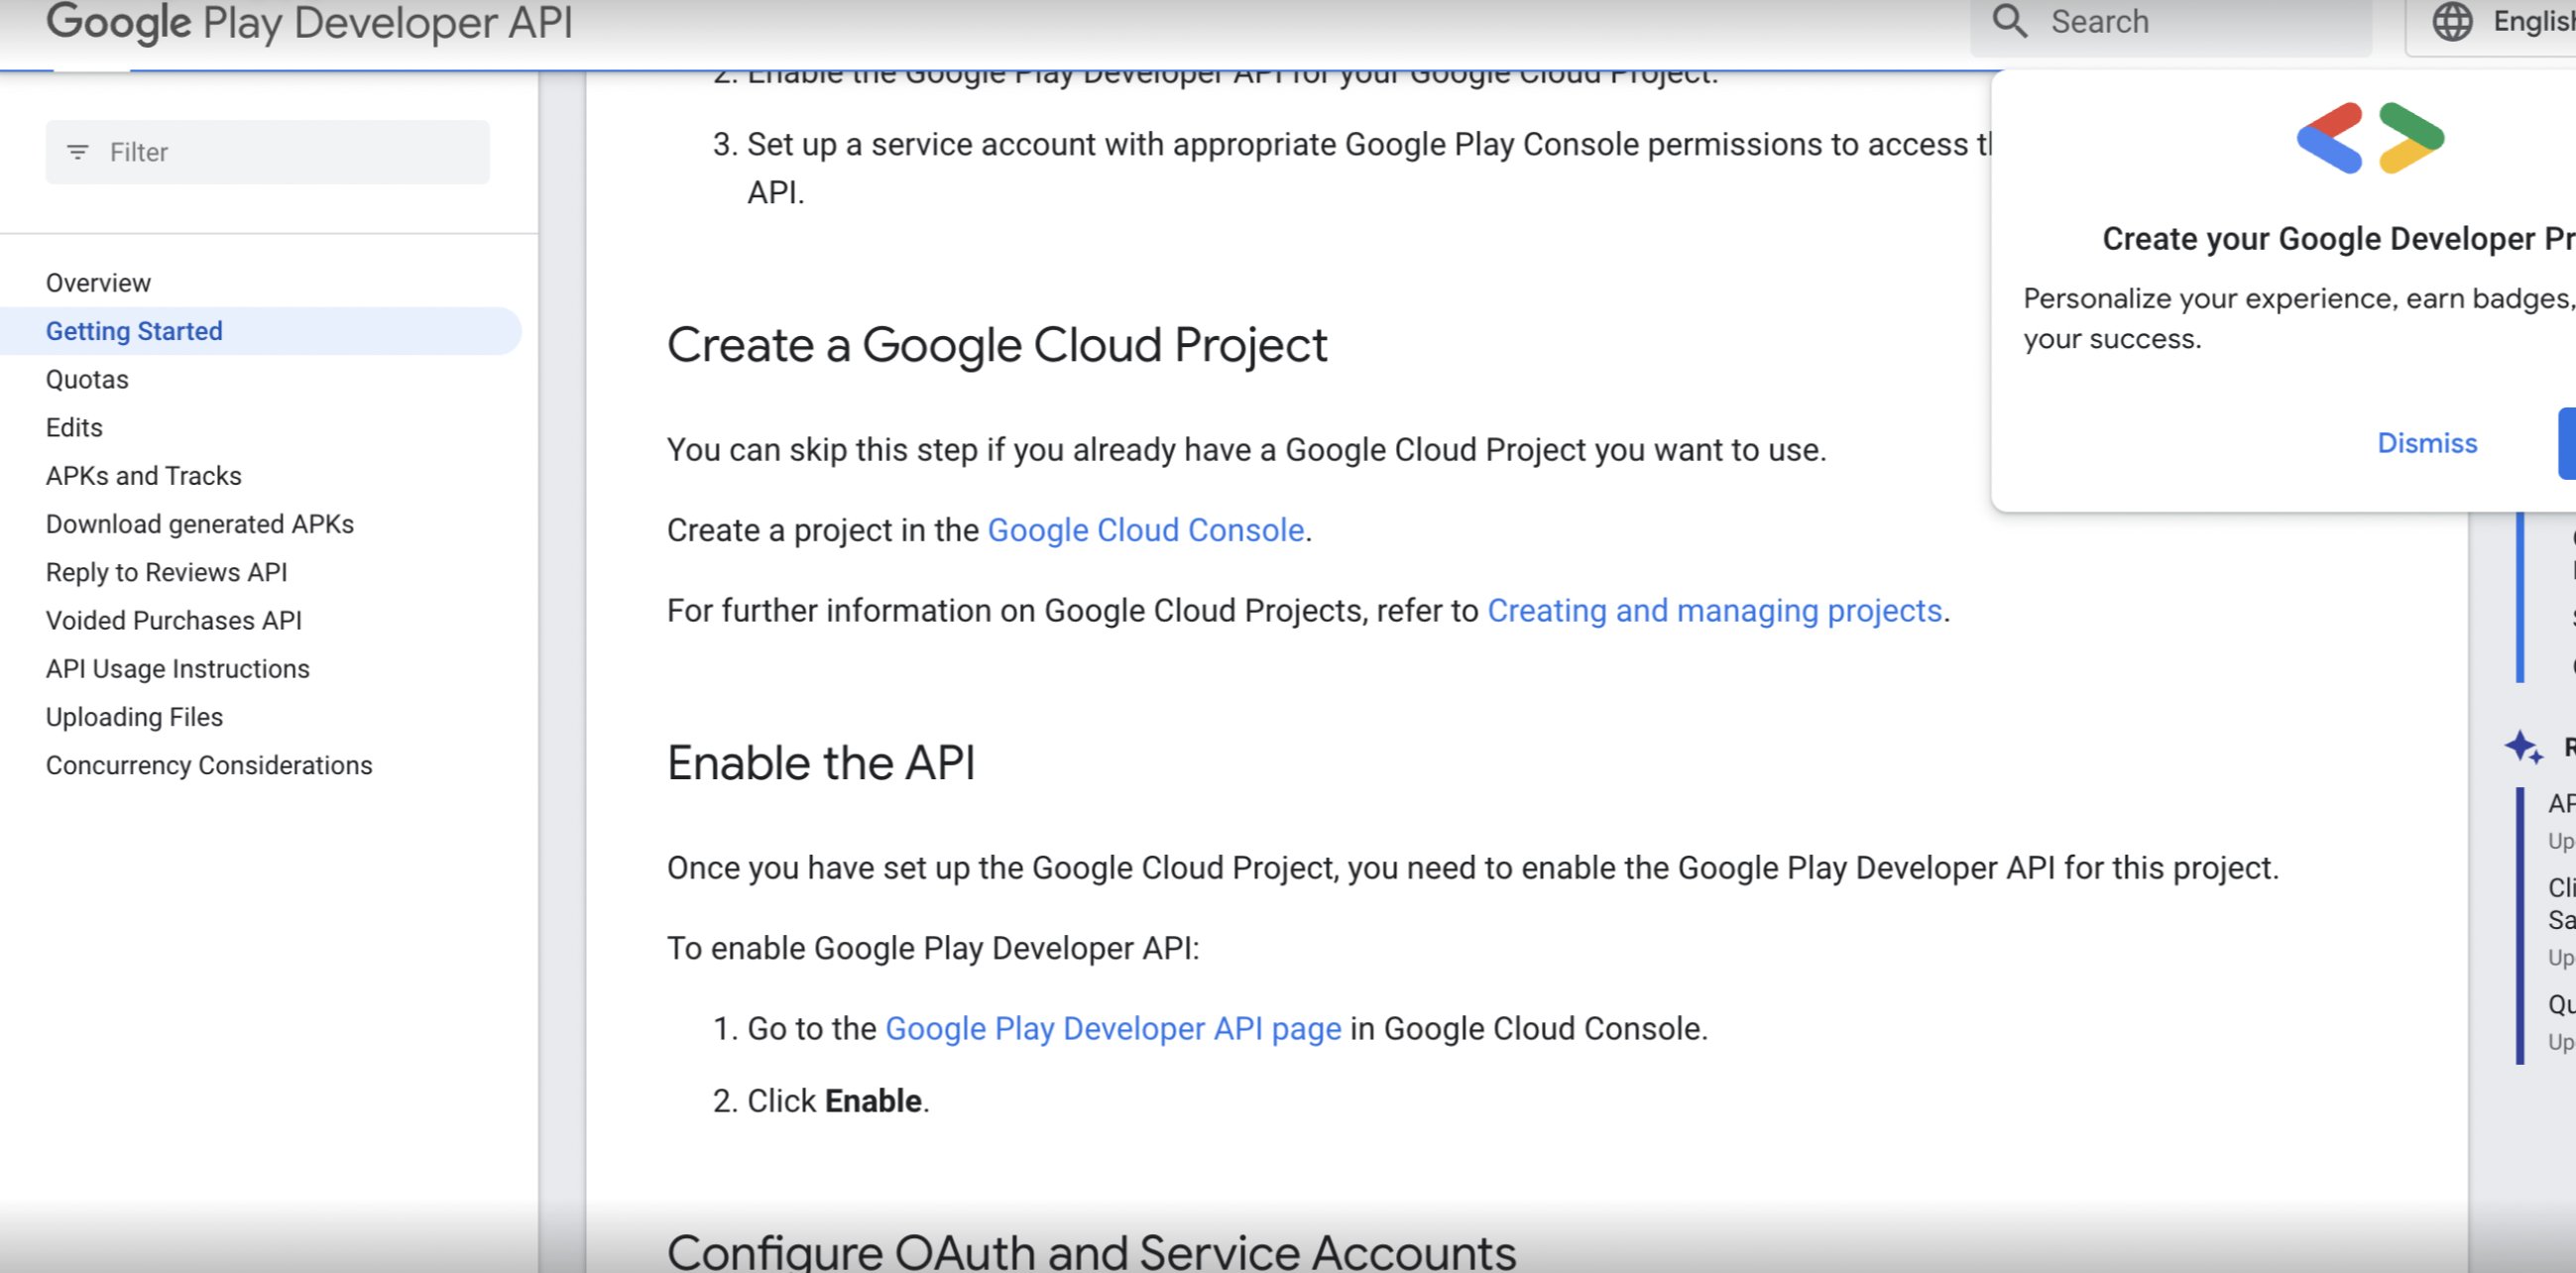
2c. Google Cloud Platform
Make sure that you have enabled the Google Developer API for your project here
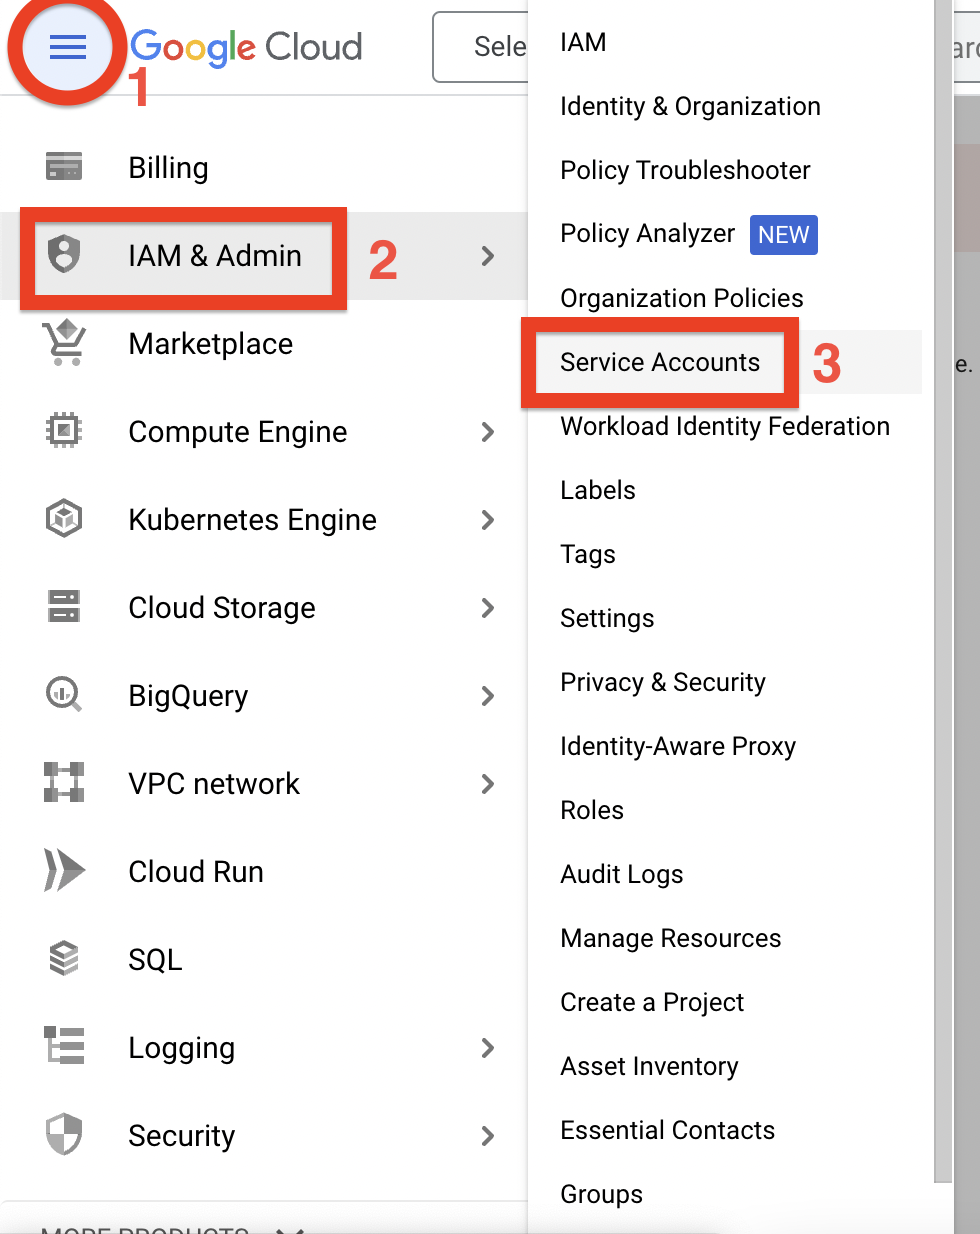
Log into the Google Cloud Platform and click on the "burger" button > select IAM & Admin > Service Accounts.
3. New Project
This step is optional and you may continue to the step 4.
Select "Create Project".
 On the "New Project" screen, enter "wappier" as the Project Name, leave the location as is, and then select "Create".
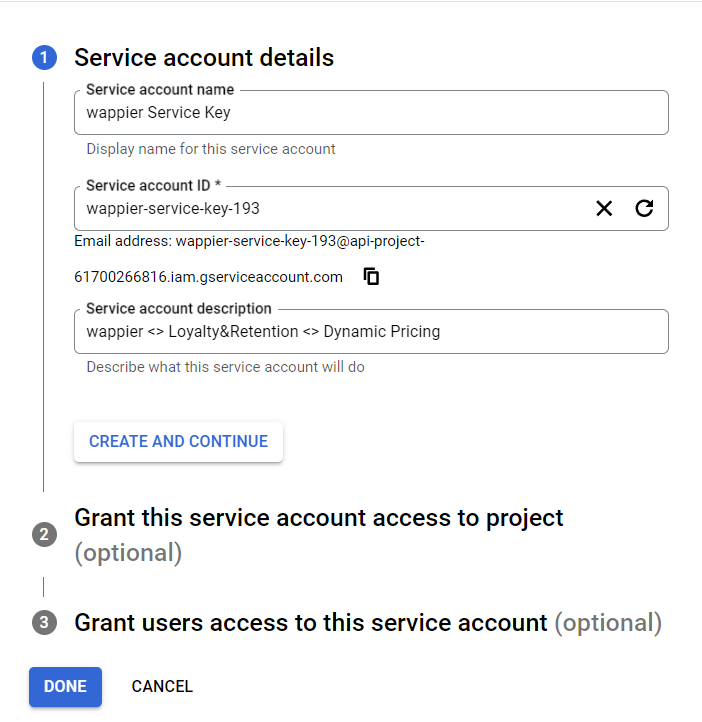
4. Create the service
Select Create Service Account and fill the name and the description of the service account and create the service.
5. Select Roles
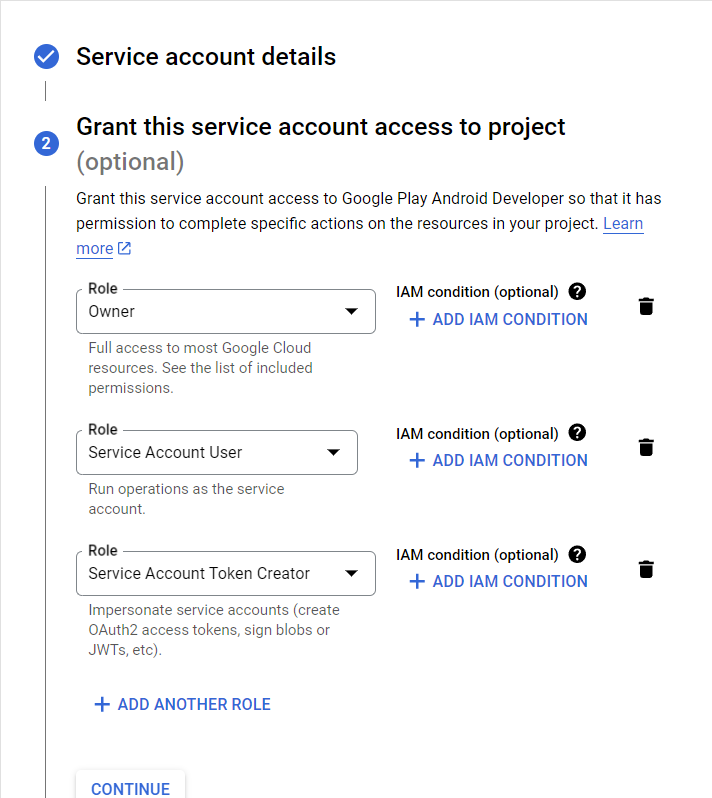
Under Project > Owner, select Service Accounts > Service Account User, then Service Accounts > Service Account Token Creator and click CONTINUE.
6. User access
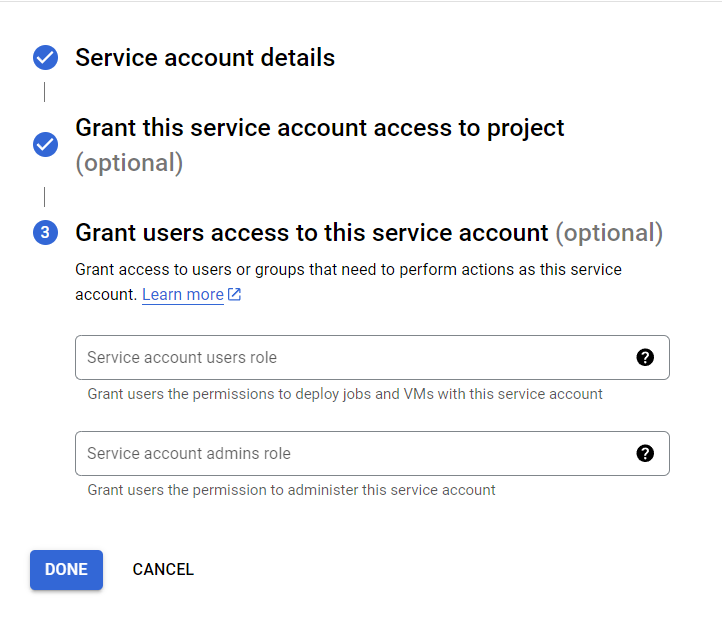
This step is optional and you may click on the DONE button.
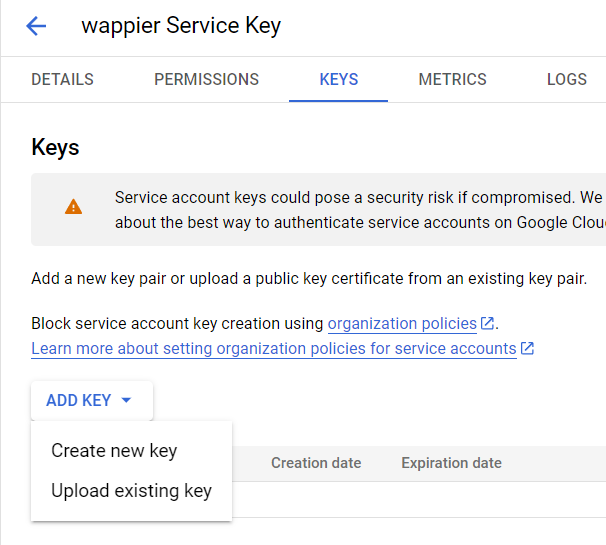
7. Create the Service key
Under Keys, select ADD KEY > Create new key.
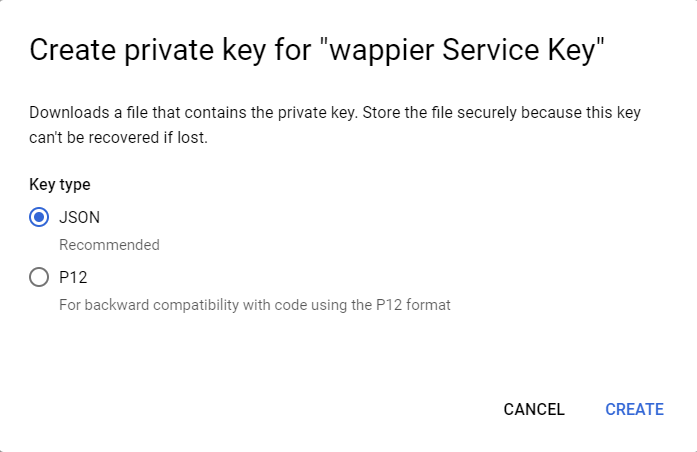
8. Export the Service Key
In the pop-up, select JSON as key type and then click on the CREATE button.
This is the Google Service Account JSON key file to be sent to wappier. The content of the JSON key file must include:
type
project_id
private_key_id
private_key
client_email
client_id
auth_uri
token_uri
auth_provider_x509_cert_url
client_x509_cert_url
universe_domain
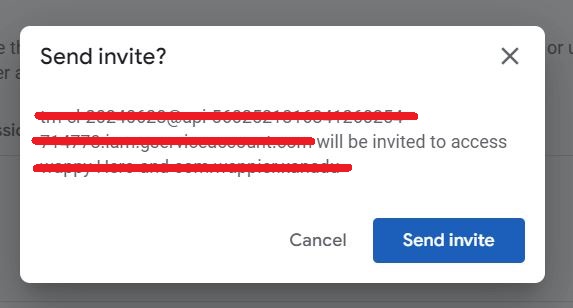
9. Invite the service account in the Users and permissions page
Once you’ve created the service account, click Done on the Google Developers Console. Then please return to the Users and permissions page and invite the new service account there.
You can copy and paste the name of the service account from the Google cloud platform.
In the section Permissions > App permissions, please add your app and select the following permissions:
- View financial data
- Manage store presence
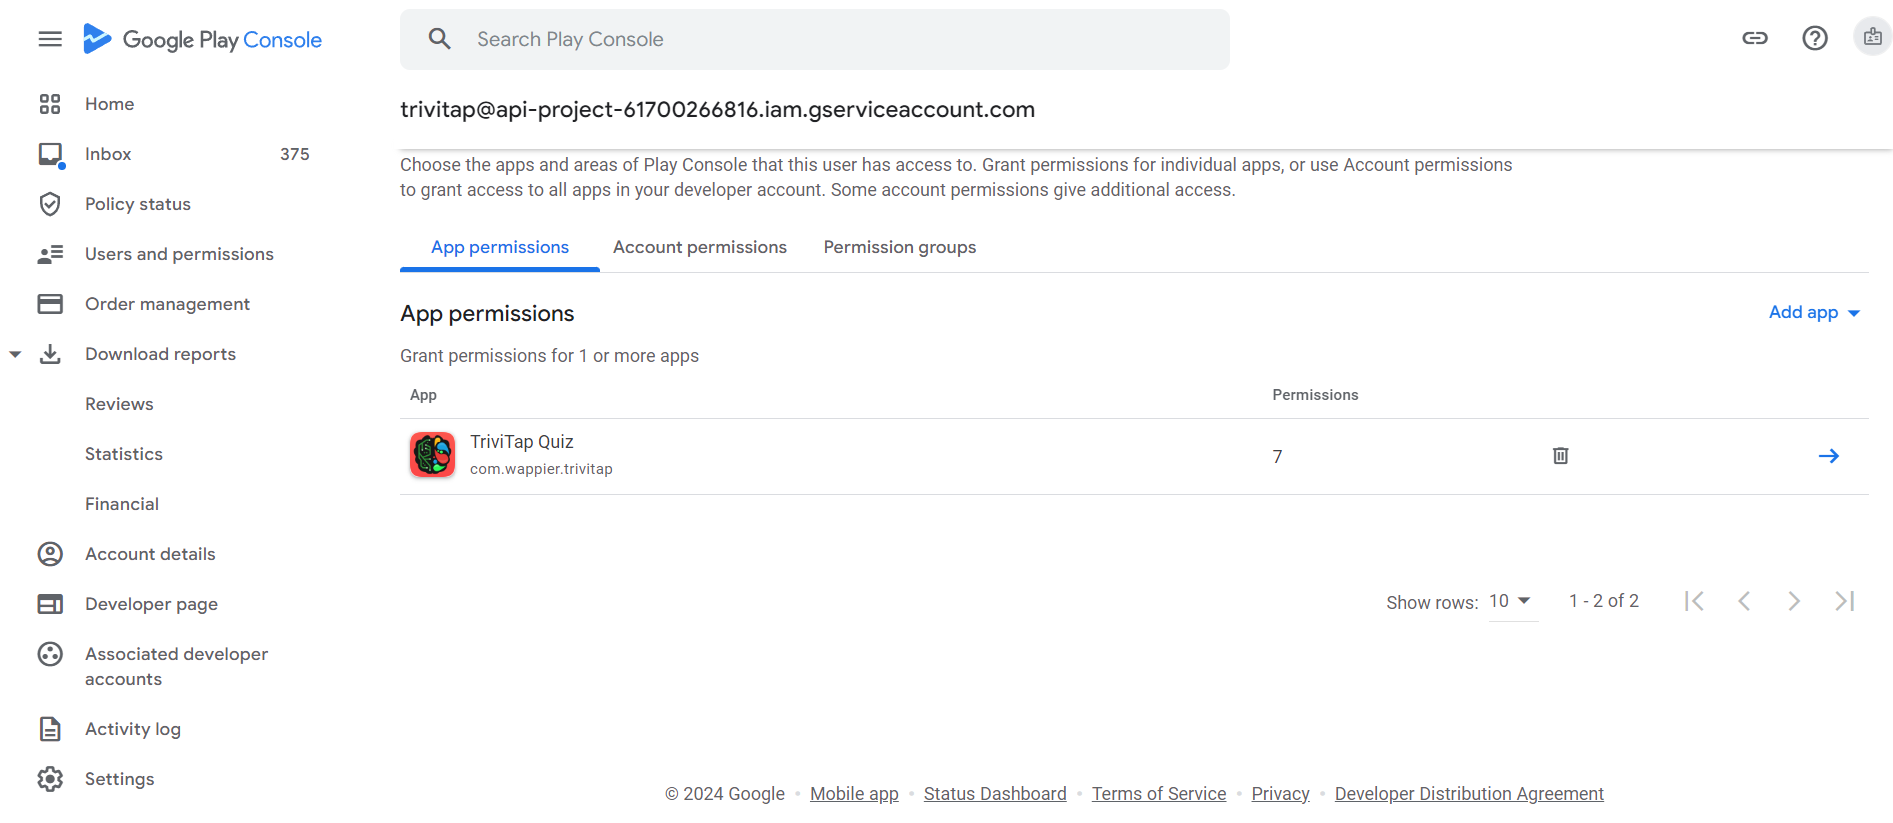

Finally, send the invitation.
10. JSON Key sharing
Please share with your point-of-contact in wappier the service account key you exported. Wappier will have the necessary access level programmatically in the Google APIs for your application.
The API access will be enabled from Google in a couple of hours after the above-described process.
Fetch financial reports programmatically (optional)
Wappier can fetch the Google financial reports programmatically, if you share with us the Cloud Storage URI , and give account permissions to the service account which you created following the above steps.
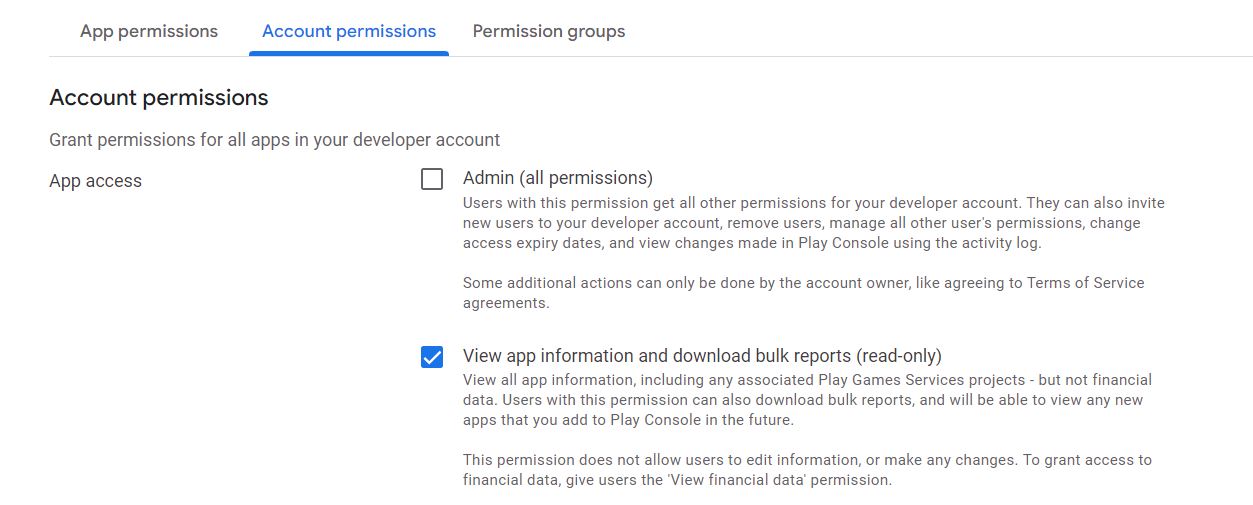
1. Add account permissions
In the pemissions section of the Users and permissions page, go to the Account permissions tab and please select the following permissions:
- View app information and download bulk reports (read-only)
- View financial data, orders, and cancellation survey responses
- Manage store presence
Do not delete the app permissions that you selected previously, even if you are giving account access on this step, because wappier will lose the necessary access using the service account at the application level.
2. Find the Cloud Storage URI
You can find the storage URI by clicking the corresponding button Copy Cloud Storage URI in any Google financial reports (path: Download reports > Financial).


